Purpose
Splice a joint on an existing truss. In some cases, you may choose to splice a chord at a joint instead of using off-panel splicing. Some reasons for this include:
- The labor cost for handling two joints may be higher than one. This includes time to stock two different plates, set up two joints in the jig, etc.
- The equipment a fabricator uses may be limited. Joints are easier, usually, to keep all the members in the right place, lined up, and not move during the process, because of the existence of the webs. Sometimes off-panel splices don't hold in place, and the two chords may be misaligned or not at the same angle.
Steps
 Watch video - Improved splicing options
To splice joints on a truss:
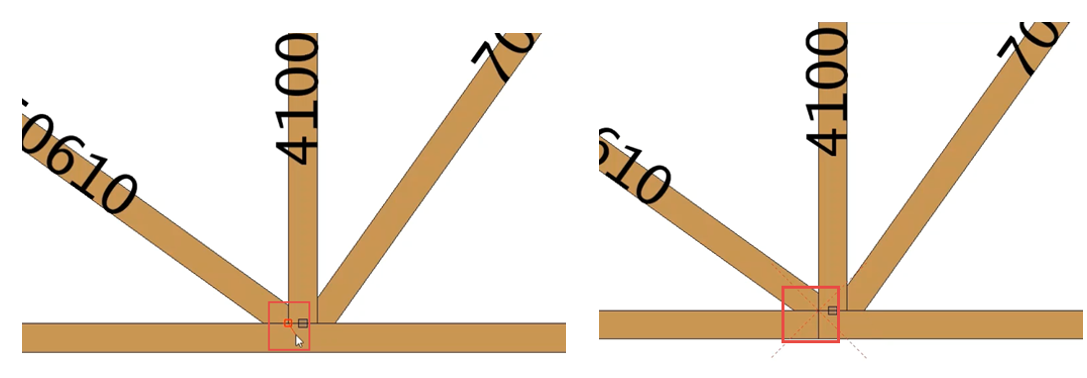
- Open the truss and select the joint to splice. If you don't select a joint, you can do so after selecting the Splice command.
The selected joint is highlighted.

- On the main toolbar, click Joint and select Splice.
 Note: While the joint is highlighted, you can also right-click to display the Joint menu.
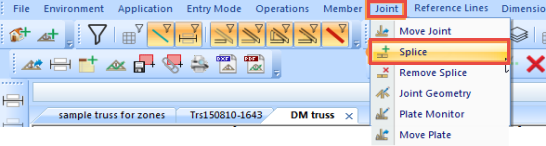
The selected joint is spliced.
Splices are applied at the exact location specified. In the example below, the splice is applied exactly at the snap point aligned at the edge of the vertical web.